This tutorial assumes you’re using create-react-app 3+ and OS X. If you have a different setup, I’ve added helpful links wherever necessary
Setting up react dev server to serve pages over HTTPS is easy. Just set an environment variable: HTTPS=true, and you’re done (official React docs).
But, if you’re working with some APIs that are restricted to certain domains, and localhost is blocked due to security concerns, you’re stuck.
Fortunately, there’s a crafty way of getting your dev server working.
Step 0: Whitelist a domain in your backend
For this example, we’re gonna assume dev.mylocalsite.com is whitelisted.
Step 1: Setup localhost mapping
The first thing you’ve got to do is set an alias for localhost. This tells your browser that even though dev.mylocalsite.comlooks like a real domain, it’s not. It’s just another name for localhost.
Here’s how you set it:
- Open
/etc/hosts - Add the following line:
127.0.0.1 dev.mylocalsite.com - Save the file
P.S. If you skip this step, you’ll get the following error: Could not find an open port at dev.mylocalsite.com.
Step 2: Add environment variables
Now that your browser knows what to do when it sees dev.mylocalsite.com, you’ve got to tell create-react-app to serve your dev version over it.
- In
.env.developmentfile in your react repository, add the following lines:
HTTPS=true
HOST='dev.mylocalsite.com'.env.developmentNow when you run npm start, you should see that react serves the development build on https://dev.mylocalsite.com:3000/.
However, it does this with a pretty inconvenient privacy error

Here’s what happened:
When you set HTTPS=true in your environment, create-react-app internally instructed webpack-dev-server to create a self-signed certificate for you.
However, browsers do not trust locally made self-signed certificates. So, you’ve got to tell the browser and also your operating system that hey, this self-signed certificate is just good ol’ me!
We’ll get to that in Step 5.
But first, there’s another problem. webpack-dev-server is making self-signed certificates for localhost and not your custom domain dev.mylocalsite.com. You can double click on the Not Secure button* in the address bar, click on Certificate, then click on *Details* and scroll down to the DNS record to verify.
So, let’s fix this problem first in Step 3 and 4.
P.S. If you don’t do anything about it, and do step 5 directly, you’ll get a NET::ERR_CERT_COMMON_NAME_INVALID error on Chrome.
Firefox has a more descriptive message:
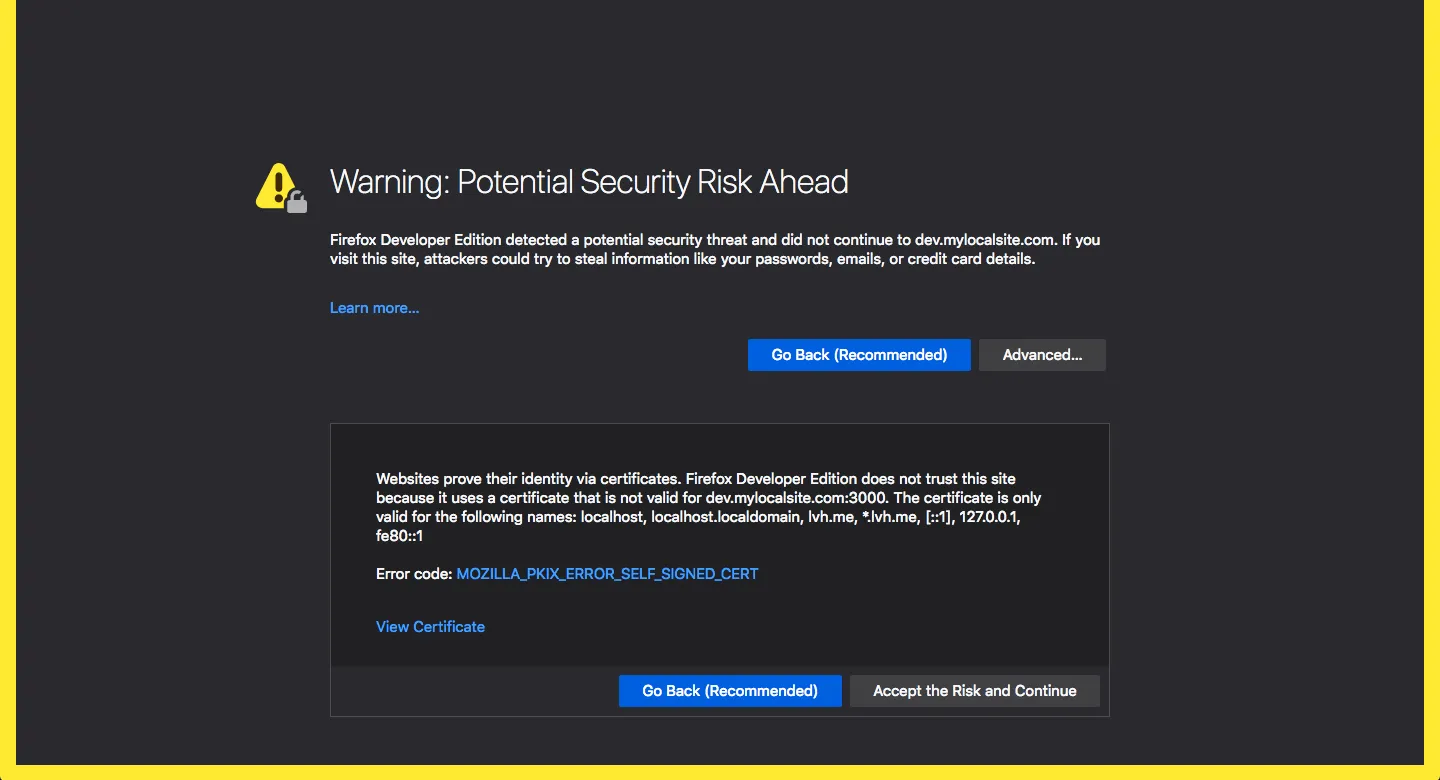
Websites prove their identity via certificates. Firefox Developer Edition does not trust this site because it uses a certificate that is not valid for dev.mylocalsite.com:3000. The certificate is only valid for the following names: localhost, localhost.localdomain, lvh.me, *.lvh.me, [::1], 127.0.0.1, fe80::1
So let’s create a self-signed certificate for dev.mylocalsite.com
Step 3: Create certificate
I don’t understand a lot about certificates so I’m going to keep this step simple. I use a tool called mkcert.
mkcert is a simple tool for making locally-trusted development certificates. It requires no configuration.
Here’s how you create your own certificate:
- Install mkcert (docs for other operating systems):
brew install mkcertzsh- Setup mkcert by running:
mkcert -installzshThis creates your own certificate authority on your system.
- Create a certificate for your custom domain:
mkcert dev.mylocalsite.comzshIt will create two files for your custom domain: your certificate at dev.mylocalsite.com.pem and the key at dev.mylocalsite.com-key.pem. 3. Concatenate the two files:
cat dev.mylocalsite.com-key.pem dev.mylocalsite.com.pem > server.pemzsh- Move the server.pem file to
/sslfolder (or wherever you prefer). Make sure to.gitignoreit.
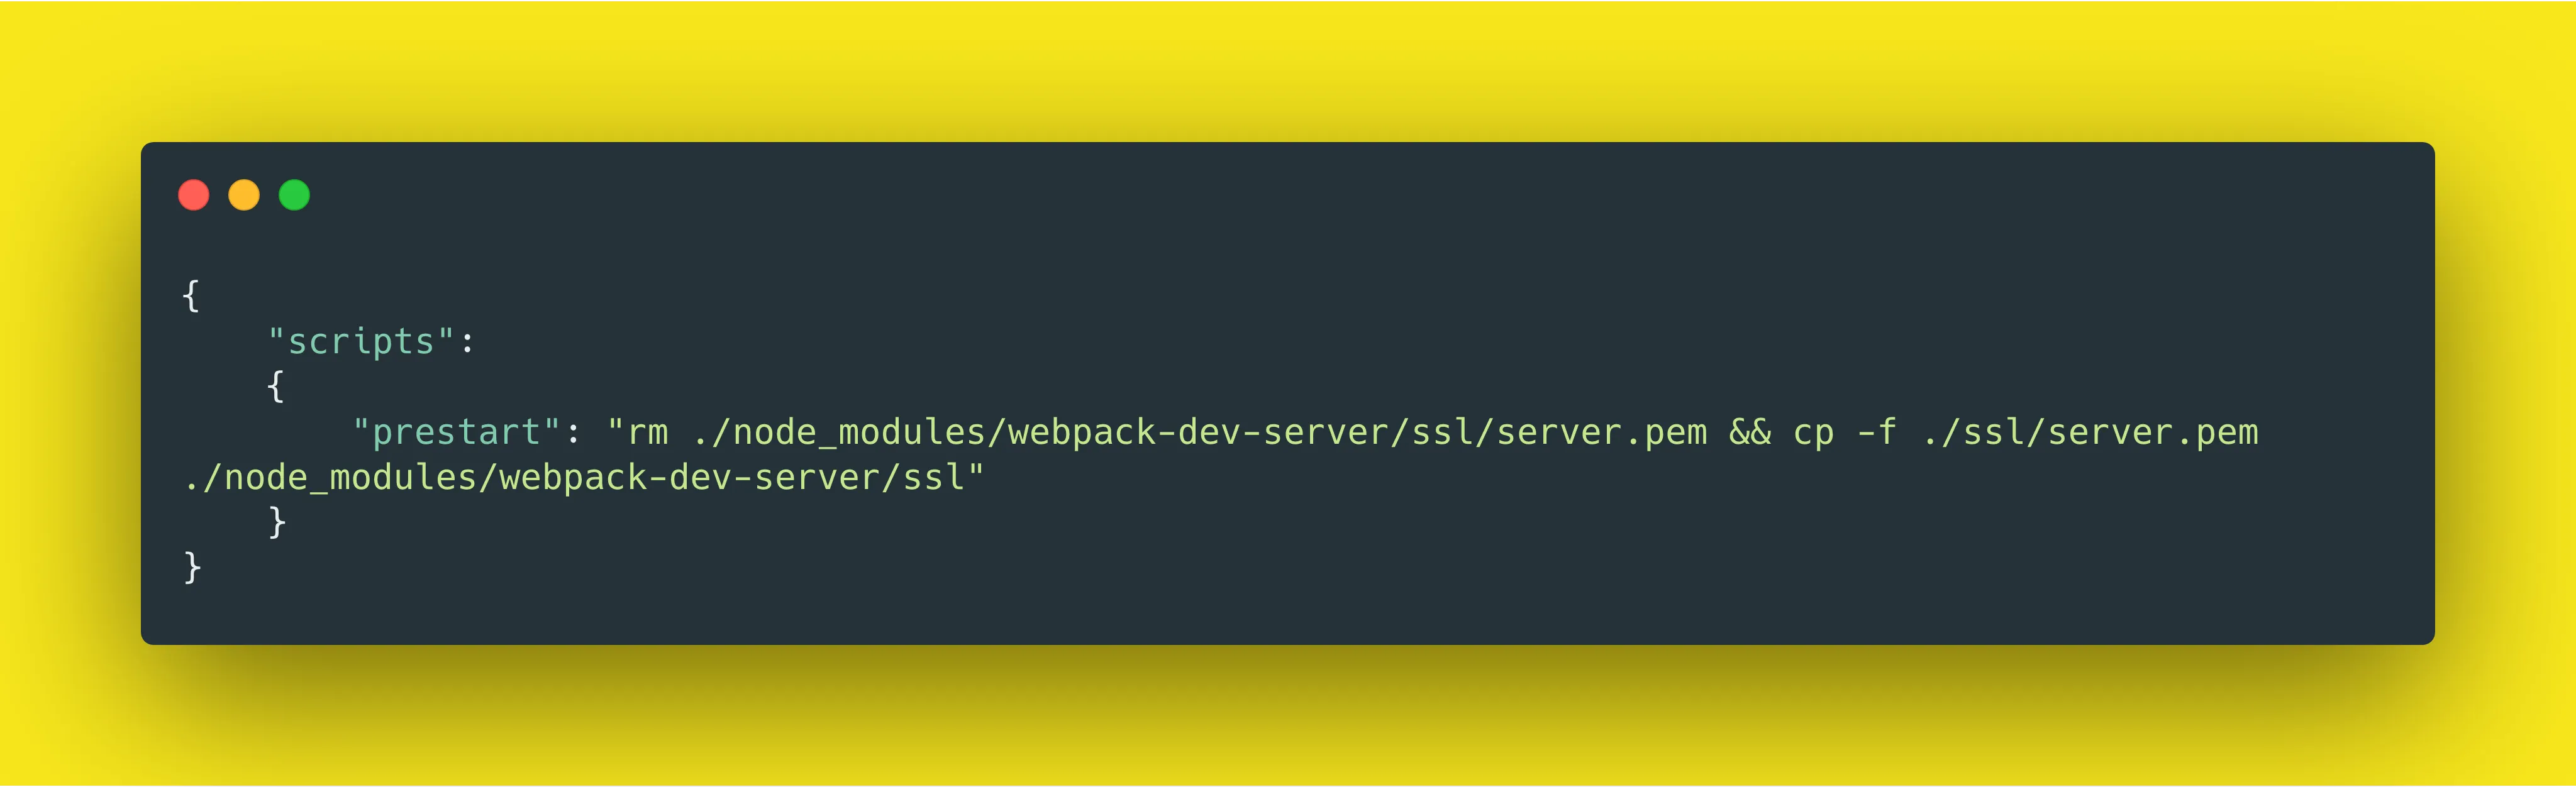
Step 4: Trick webpack-dev-server into using your certificate
In this step, we’ll be tricking the webpack-dev-server by adding a prestart hook in your package.json. Prestart hooks are executed by npm before the actual start script.
{
"scripts": {
"prestart": "rm ./node_modules/webpack-dev-server/ssl/server.pem && cp -f ./ssl/server.pem ./node_modules/webpack-dev-server/ssl"
}
}package.jsonHow it works:
webpack-dev-server automatically creates a self-signed certificate at ./node_modules/webpack-dev-server/ssl/server.pem. We just remove it and copy the certificate we generated to that location.
Step 5: Tell your OS/browser to trust the certicate
Now, when you start the dev server and open the browser, you’ll still see the privacy error but with a different certificate.
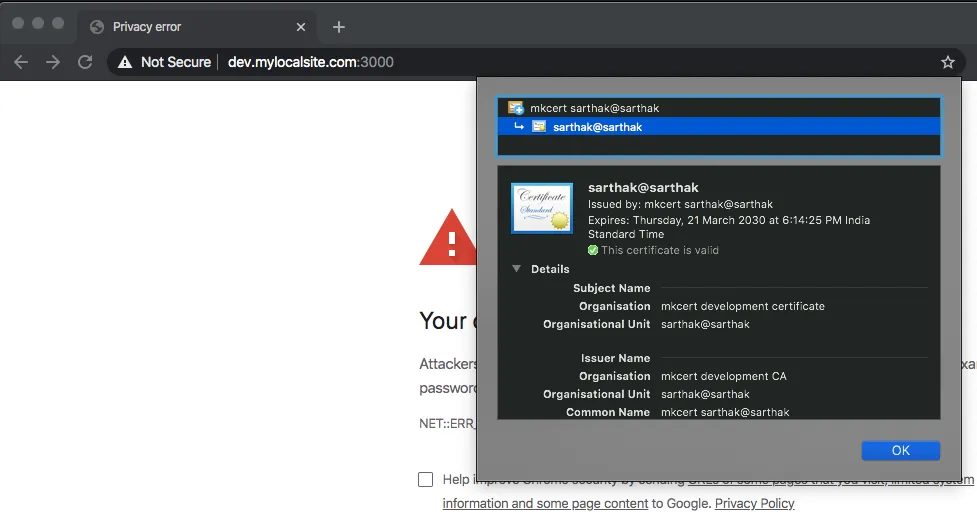
Let’s first verify that our certificate is created for dev.mylocalsite.com
Click on Not Secure button in your browser address bar. Then click on Certificate. Click on Details and scroll down until you see this line:
DNS Name: dev.mylocalsite.com. This means you’ve created a certificate up correctly.
- Copy the certificate to your system by dragging and dropping the certificate image with blue borders.
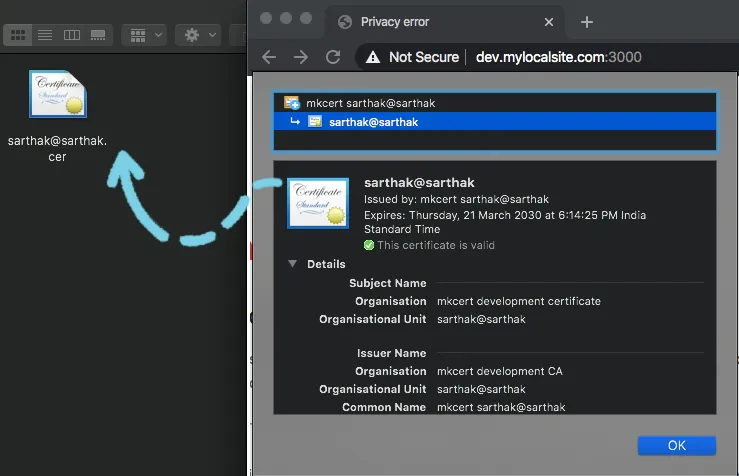
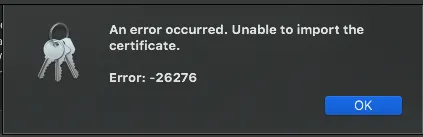
- Double click on the certificate to open it in Keychain Access (you’ll be asked for your password). I get an error on this step but after clicking on OK, it works correctly.
- Now double-click on the certificate, expand the Trust accordion and set permissions to Always Trust (you’ll be asked for your password again).
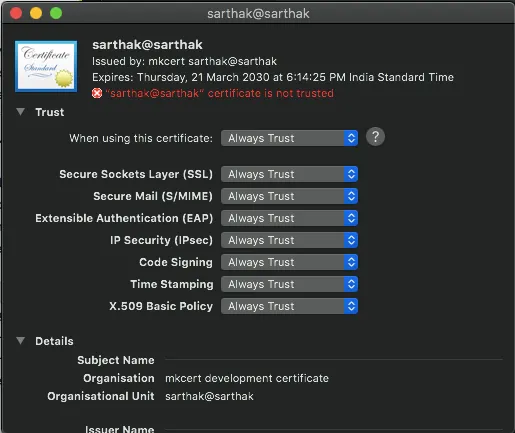
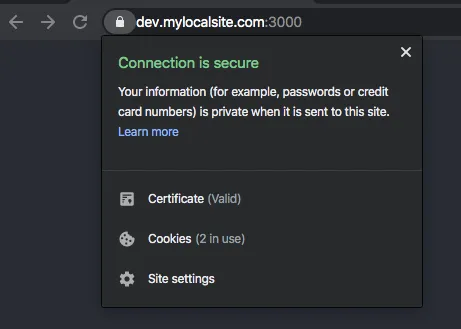
- Refresh the browser and you’ll see that your certificate is now trusted.
That’s all you need to get started. The certificate you created using mkcert is valid for 10 years so you won’t need to repeat these steps for a long while…
P.S. These sources helped me patch together this solution: (source 1, source 2)
If you found this post useful, please let me know on twitter!